Preliminary Requirements
Before we get started, you will need the following:
-
Access to a DC/OS server running Scale. If you don’t have that set up, you can find quick start instructions for deploying Scale on a DC/OS cluster here: https://ngageoint.github.io/scale/quickstart.html.
-
Access to a common data storage location all Scale nodes can access for local file sharing. In our example, we used a shared network folder.
-
A Docker Hub account. You can create one at https://hub.docker.com/signup.
-
Docker software for your operating system. You can download Docker here: https://docs.docker.com/get-docker.
If you have all of these, you are ready to deploy your first process on Scale!
Procedure Overview
-
Create a single-input/single-output process.
-
Download and install the Seed Command Line Interface (CLI).
-
Create a Dockerfile.
-
Create a Seed manifest file.
-
Create your Seed-compliant Docker image.
-
Publish your image to your Docker Hub repository.
-
Add your image to Scale through SILO (Seed Images Location Operation).
-
Create input and output workspaces.
-
Create your job type.
-
Create a recipe to run an instance of your job type.
-
Create a strike to run your recipe.
-
Verify your results.
Create a Single-Input/Single-Output Process
You can create your process in almost any programming language, including Python, MATLAB, C++, Go, or Node.js.
Here is a simple process in Python that you are welcome to use.
It takes an input filename and output file directory as arguments, copies the input file, and saves it as new-output.txt in your output file directory.
Name this Python file input-output.py.
import os
import sys

# Demo program to input and output a file
# Used to test Scale

# Assign input filename
INPUT_FILE = sys.argv[1]
# Assign output directory
OUTPUT_DIR = sys.argv[2]
# Assign output filename
OUTPUT_FILE = OUTPUT_DIR + '/new-output.txt'

def main():
    # Open input and output files.  Use of "with" will ensure proper closure of both files
    # when with statements are exited.
    with open(INPUT_FILE, mode='r') as infile:
        with open(OUTPUT_FILE, mode='w') as outfile:
            for line in infile:
                outfile.write(line)

# Call the main function
main()
You will also need an input file in the right format for your process.
For this Python process, create a simple text file with a few lines of text, and name it with the .txt extension.
Save it in the same folder as your process.
Download and Install the Seed Command Line Interface (CLI)
You will find the latest version of Seed here: https://github.com/ngageoint/seed-cli/releases
-
Scroll down and click on the green-outlined button on the left that says “Latest Release”
-
Scroll down to “Assets” and download the Seed version for your operating system.
|
Tip
|
Use |
For more detailed instructions, refer to the Seed installation instructions.
You should now be able to run seed from any directory.
Create a Dockerfile
A Dockerfile is a set of instructions for what needs to be done to run your process. Use a text editor to create it in the same directory as your process and name it simply “Dockerfile” (without any suffix).
For a complete list of Dockerfile directives, see the Dockerfile reference.
As an example, here is a Dockerfile to accompany the input-output.py file from Step 1.
FROM alpine:3.9

RUN apk -U add python3

WORKDIR /app

COPY ./input-output.py .
The Dockerfile defined in this example takes the following steps:
-
Start
FROMthe pre-existingalpine:3.9Linux image. This is an official image, validated by Docker. -
RUNthe commandapk -U add python3inside your image filesystem, which will install Python 3. -
Use
WORKDIRto create the/appdirectory and specify that all subsequent actions should be taken from within/appin your image filesystem (never the host’s filesystem). -
COPYthe file input-output.py to your work directory.
Create a Seed Manifest
-
Go back to your terminal window.
-
Navigate to the directory containing your process.
-
Create a generic seed manifest file named “seed.manifest.json” by running:
seed init -
Edit the seed manifest file to customize it to your algorithm.
|
Tip
|
See the Seed specification for detailed information on each property. |
Here is an example of the seed manifest file for our input-output.py file:
{
  "seedVersion": "1.0.0",
  "job": {
    "name": "io-demo",
    "jobVersion": "1.0.0",
    "packageVersion": "1.0.0",
    "title": "Input/Output Demonstration",
    "description": "Reads in a text file, changes the filename, and saves an identical copy to the destination directory.",
    "tags": [
      "input",
      "output"
    ],
    "maintainer": {
      "name": "Nikkala Thomson",
      "organization": "AIS",
      "email": "nikkala.thomson@appliedis.com"
    },
    "timeout": 3600,
    "interface": {
      "command": "python3 input-output.py ${INPUT_FILE} ${OUTPUT_DIR}",
      "inputs": {
        "files": [
          {
            "name": "INPUT_FILE",
            "required": true,
            "mediaTypes": []
          }
        ]
      },
      "outputs": {
        "files": [
          {
            "name": "OUTPUT_FILE",
            "mediaType": "text/plain",
            "pattern": "*.*"
          }
        ]
      }
    },
    "resources": {
      "scalar": [
        {
          "name": "cpus",
          "value": 1
        },
        {
          "name": "mem",
          "value": 256
        },
        {
          "name": "disk",
          "value": 256
        }
      ]
    }
  }
}
Build a Seed-compliant Docker Image
A Docker image is a read-only file consisting of multiple layers that contains the complete instructions for creating a Docker container. The Dockerfile, seed.manifest.json, the process file, and any other necessary supporting files will be used by the Seed CLI to build your seed-compliant Docker image, which will contain all of the information needed by Scale to run your process.
With Docker running, build your Docker image by running seed build in the terminal window in the same directory as your process file.
If all goes well, output similar to the following will be displayed:
INFO: Successfully built image. This image can be published with the following command:
seed publish -in io-demo-1.0.0-seed:1.0.0 -r my.registry.address
This image can be run with the following command:
seed run -rm -in io-demo-1.0.0-seed:1.0.0 -i INPUT_FILE=<file> -o <outdir>
Make a note of your image name, which in this example is “io-demo-1.0.0-seed:1.0.0”.
Test your image by running the following command:
seed run -rm -in <your-image-name> -i INPUT_FILE=<your-input-file> -o <your-output-directory>|
Note
|
Do not use |
This should create a new directory and place your output file there.
Publish an Image to Docker Hub
The Docker Hub is a service provided by Docker for finding and sharing container images. You will need to publish your image to the Docker Hub before you can access it in Scale.
Login to Docker by running docker login.
Publish your image to Docker with the following command:
seed publish -in <your-image-name> -r docker.io -O <your-docker-username>Add an Image to Scale Through SILO
SILO (Seed Images Location Operation) provides a link between Docker Hub and Scale, locating Seed-compliant images Scale can use. You can learn more about SILO here: https://github.com/ngageoint/seed-silo.
The first and only the first time you use SILO, you will need to add your Docker Hub registry to its list of registries to search for Seed-compliant images.
Connect to the server where SILO is running; e.g. ssh user@hostname-or-ip.
Obtain an authorization token by entering the following at the command line:
curl -H "Content-Type: application/json" -d '\{"username":"<your-server-username>", "password": "<your-server-password>"}' "<your-silo-address>/login" -vCopy the authorization token provided by the above command and use it to add your Docker Hub registry to SILO:
curl -H "Authorization: Token <your-auth-token>" -H "Content-Type: application/json" -d '\{"name":"<your-docker-username>", "url":"https://hub.docker.com", "org":"", "username":"<your-docker-username>", "password": ""}' <your-silo-address>/registries/addSILO will automatically scan all registries periodically, but you if you don’t want to wait for that, you can trigger a scan manually:
curl -H "Authorization: Token <your-auth-token>" -H "Content-Type: application/json" <your-silo-address>/registries/scanThis may give a timeout error message: Gateway Time-out – The server didn’t respond in time.
Ignore this message, the scan should still complete.
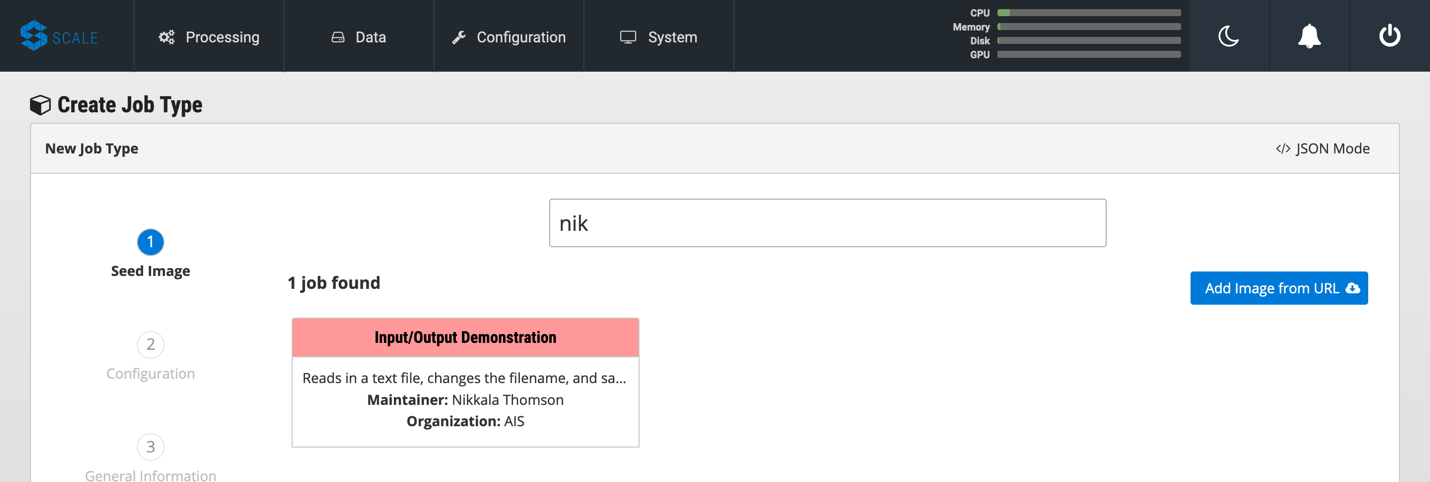
To check that your new image is available in Scale, go to Scale, which can typically be accessed in your browser at scale.<your-server-name>. Navigate to “Configuration → Job Types” and click on the “+” to create a new Job Type. In the “Search Jobs” field at the top, enter part of your username or image name to locate your image.
|
Note
|
You cannot search by the title of your process, just the username or image name. |
Create Input and Output Workspaces
Before you can add your process as a new job type in Scale, you need to create your input and output workspaces. A workspace is an external host folder or S3 bucket that can be connected to Scale. A workspace may be the source location of your incoming data or the destination location for products created by your recipes, but never both. Input and output must each have their own workspace.
-
Go to the root directory in your common data storage location and create a new folder with two subfolders. One of the subfolders will be for your input and one of the subfolders will be for output; name them accordingly.
-
Copy the input file you created in Step 1 into the input folder.
-
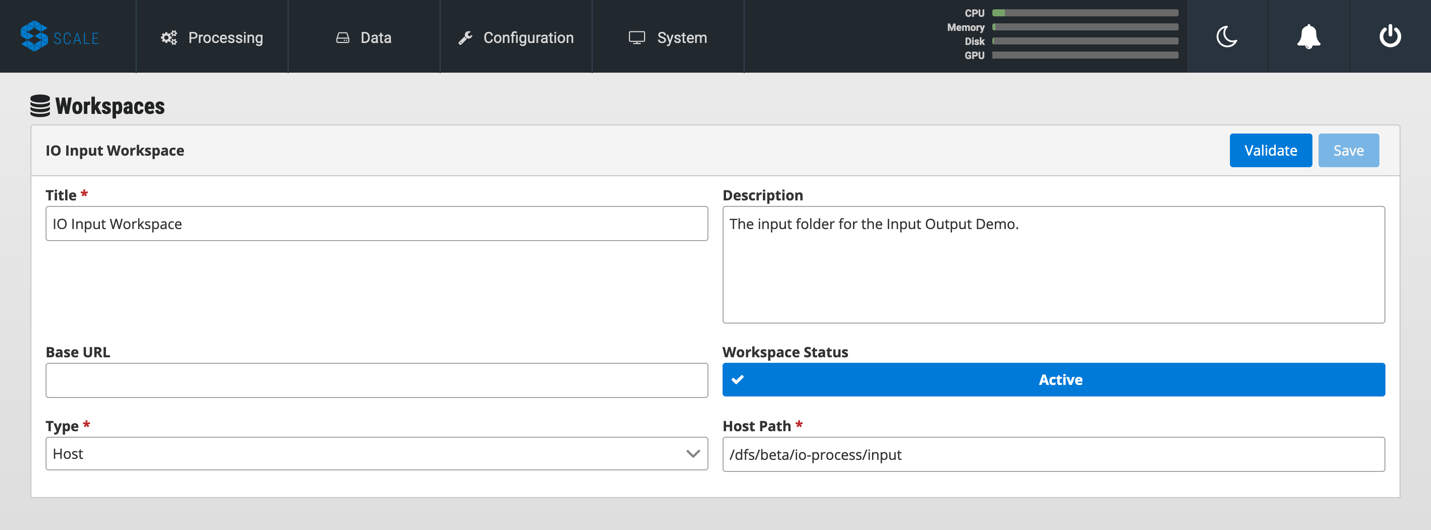
Go back to Scale, navigate to “System → Workspaces” and click on the “+” to create a new workspace. Enter a title for your input workspace, and a description if you like. Under “Type,” select “Host” and enter the path to your input folder in “Host Path” to the right.
-
Click “Validate” and then “Save.”
-
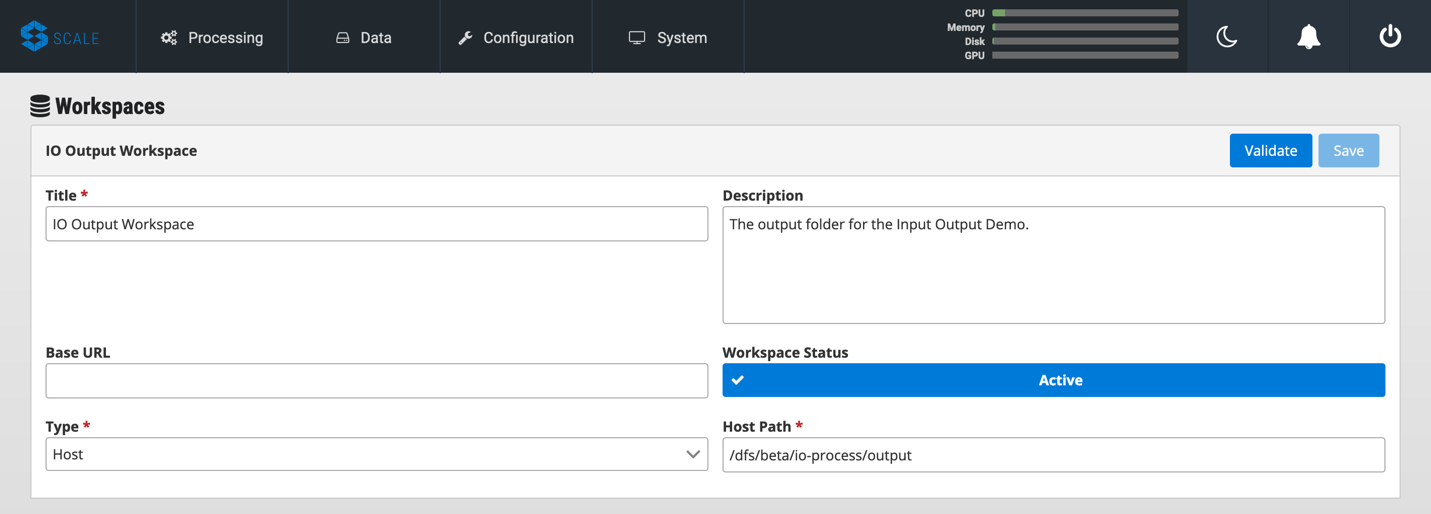
Repeat this process using your output folder to create an output workspace.
Create a Job Type
A job type represents a Seed image that has been imported into Scale. To create your job type:
-
Navigate to “Configuration → Job Types” then click on the “+” to create a new job type.
-
Enter the first few letters of your Docker username or image name in the “Search Jobs” field, until you locate your job. Click on that job and click “Import” in the lower right.
-
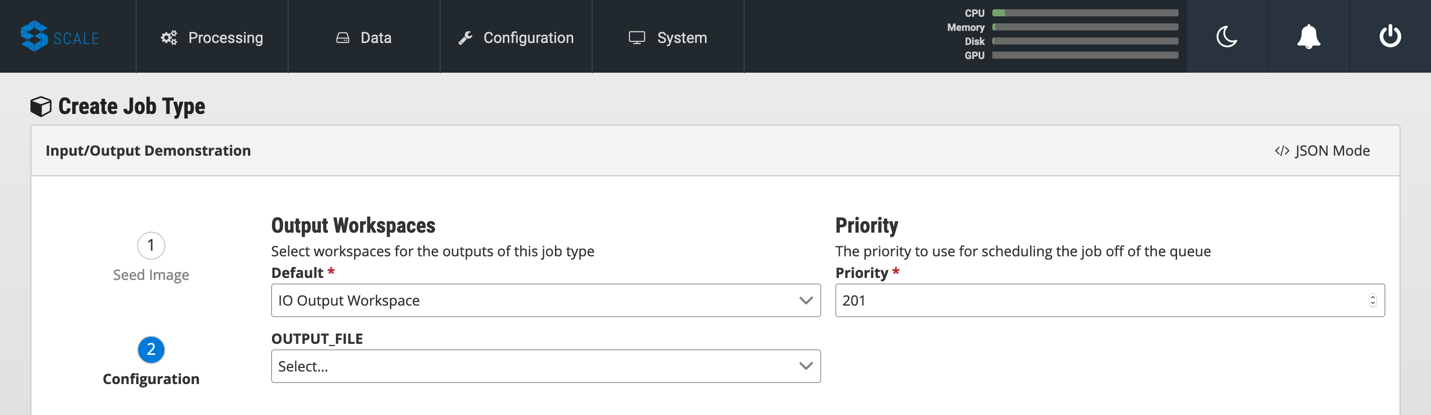
Click on the “2” (Configuration) at the left. In the “Default” box, select the output workspace you created in step 7. In the “Priority” text box, enter “201” (a normal priority). Do not select anything for “OUTPUT_FILE.”
-
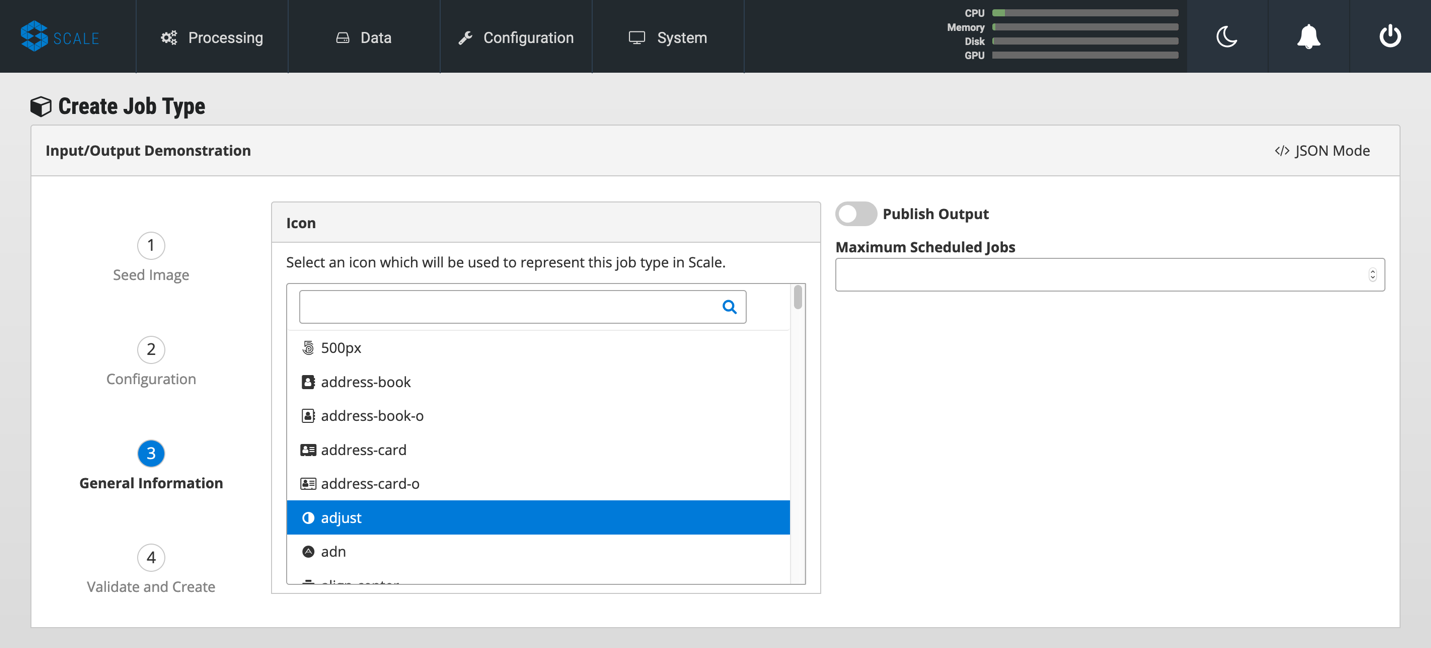
Click on the “3” (General Information) and pick an appropriate-looking icon for your job. The name of the icon doesn’t matter.
-
Click on the “4” (Validate and Create), click “Validate” and then “Save”. This will create your job type.
Create a Recipe to Run an Instance of a Job Type
A recipe is a collection of one or more job types that interact with each other in a workflow.
-
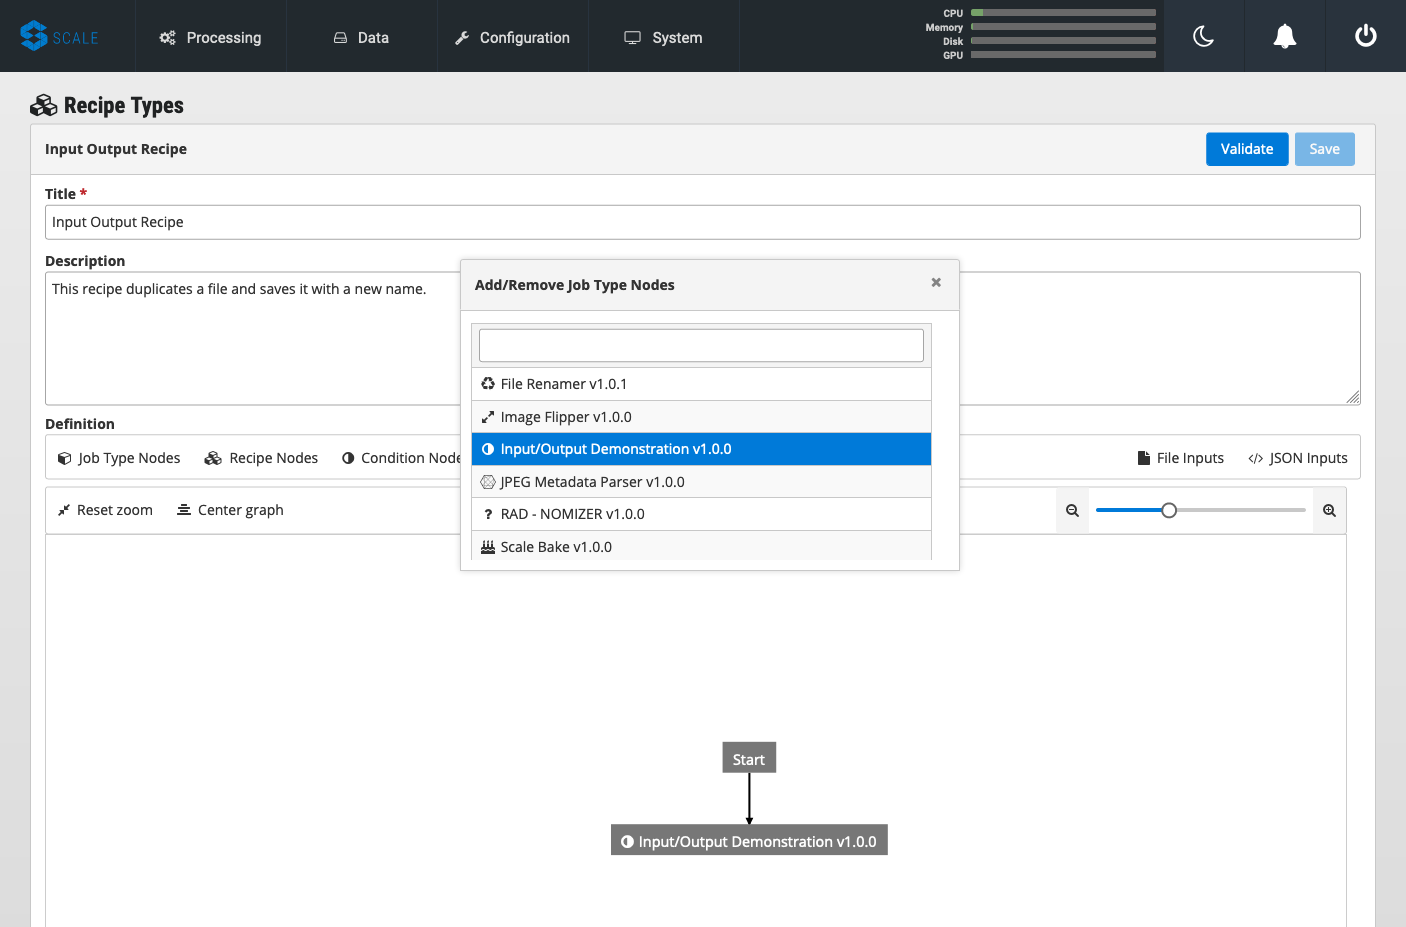
Navigate to “Configuration → Recipe Types” then click on the “+” to create a new recipe.
-
Enter a title for your recipe, and a description if you like.
-
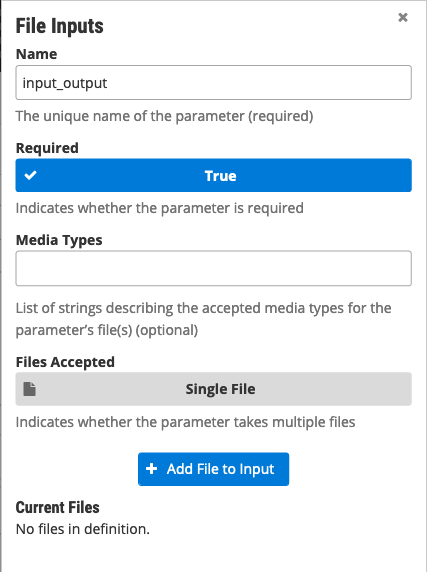
Click on “File Inputs” in the middle right and enter a name (commonly “INPUT_FILE”) to represent your input file, set “Required” to “True,” then click “+ Add File to Input” and close the window.
-
Under “Definition,” click on “Job Type Nodes” and select your newly created job type.
-
Find the gray diagram near the bottom of the screen. Click on the gray job type node in the diagram that matches your job node. Look for “Inputs” in the middle. Click the “+” to add an Input Connection, then select the name you just created above.

-
That’s it! Click “Validate” then “Save” to create your recipe.
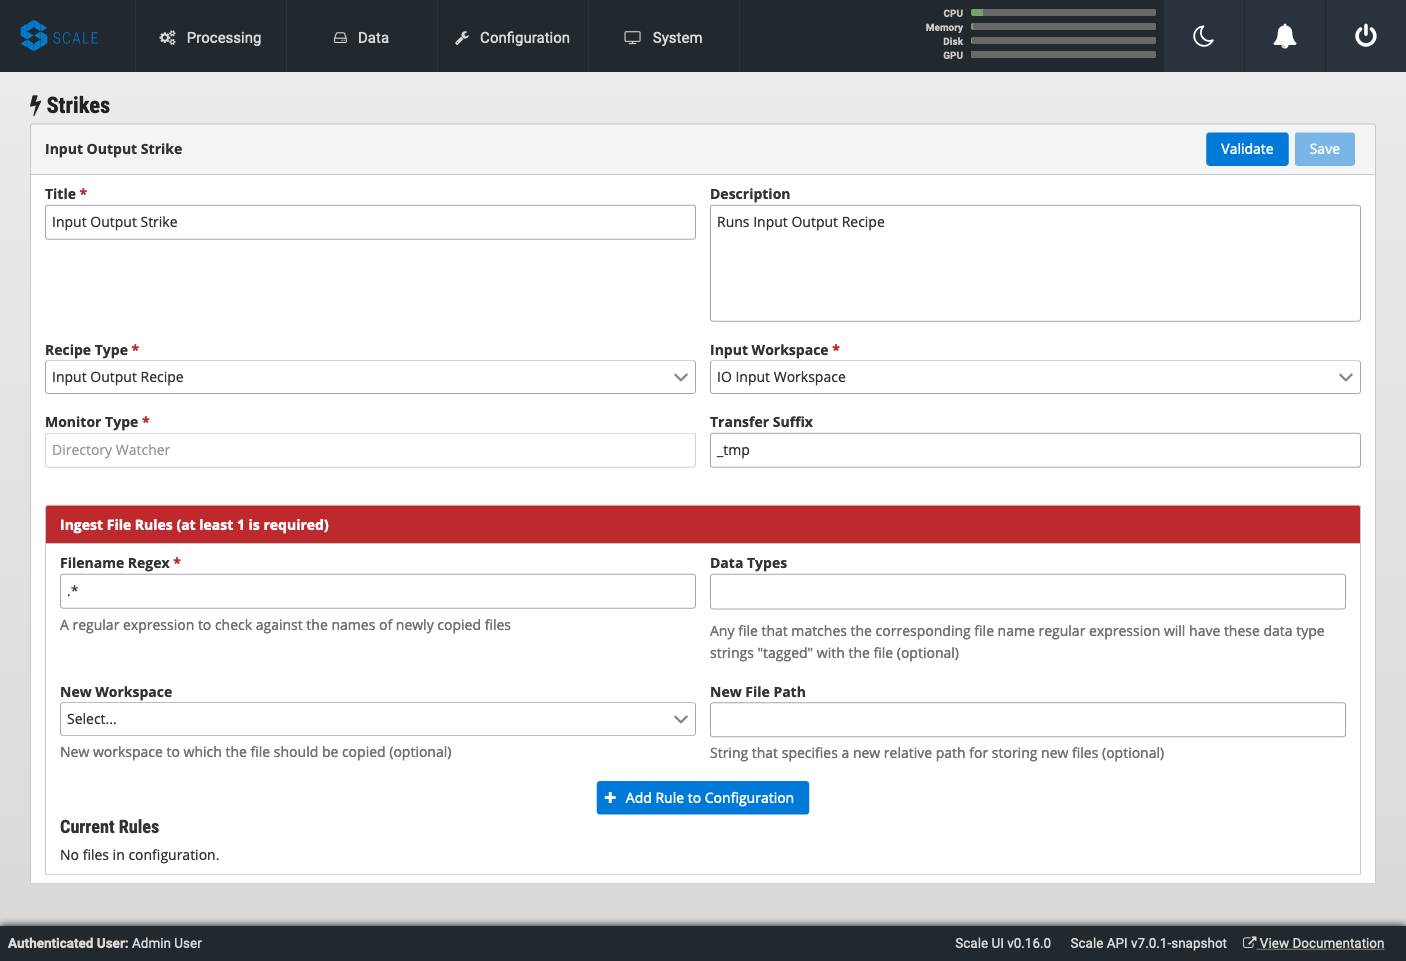
Create a Strike to Run a Recipe
A strike is a long-running process that constantly looks for new files in a specific workspace. When it finds a new file in the workspace, it triggers recipe execution.
-
Navigate to “System → Strikes” then click on the “+” to create a new strike.
-
Enter a title for your strike, and a description if you like.
-
Select your newly created recipe under “Recipe Type,” and your input workspace under “Input Workspace.”
-
Then go down to “Ingest File Rules” and enter “.*” to indicate that all file types are acceptable, then click “+ Add Rule to Configuration”
-
Click “Validate” then “Save” to save your strike and automatically begin to run it.
Verify the Results
You are done! Navigate to “Processing → Running Jobs” to view your strike, which will keep running until you terminate it. Since you added your input file to your input folder already, your process should have run one time, producing an output file. Go to your output workspace location to view your output file. It will be nested several folders deep.
More Information
For further information about the Scale ecosystem, visit the following links.